
Now we must find a way to get our Target Block up off the ground. The TomahawkGuys use a variety of different stands depending on the size of the block and whether we want the stand to be portable or not.
The most basic stand would be just to support the target block up on some other pieces of wood. This is the way we did our first target and used this set-up for a few months before moving on to more “sophisticated” methods of support!
Basic Stand
If the target block is not too big a nice quick and simple way to support it is to nail a couple 2×4 legs to the back in a slight inverted “V” pattern and either lean it against a tree or fence or use another piece of wood wedged into the “v” to make a tripod stand. This only takes a few minutes to build and you are ready to go. It is amazingly stable but with small children and animals around some care needs to be observed as it can be knocked over rather easily.
Custom Stand
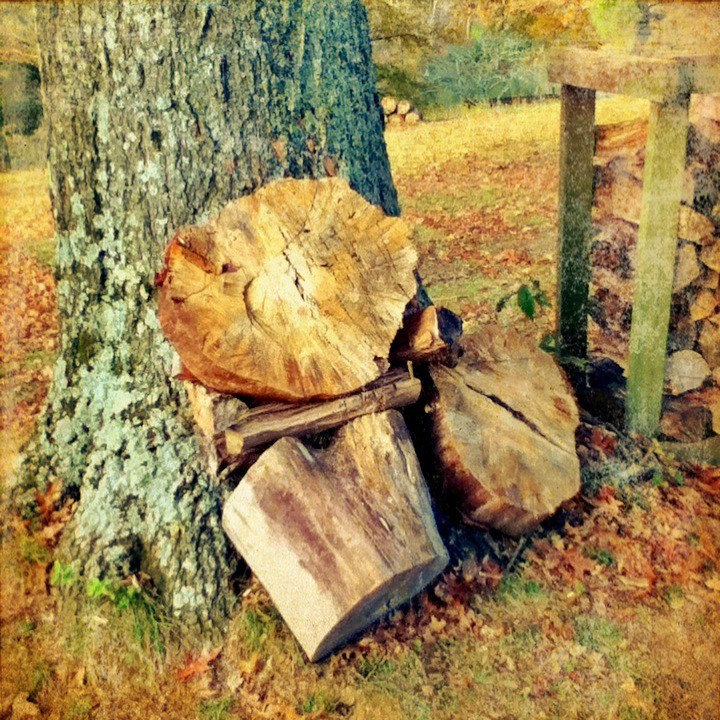
The picture above shows a very large and heavy Sycamore target supported with some landscape timbers screwed into the sides. We use this leaning against another tree. We can turn it around and use the other side when the face gets too chopped up. This particular target is very heavy and we made sure the angle that it is leaning is enough to minimize the chance of it falling forward. The downside to this method is that we can’t rotate the target to even out the cut patterns from our throws. Also notice that we have several other blocks around the target block. This is to protect the live tree from getting hit by errant throws.
Portable Stand
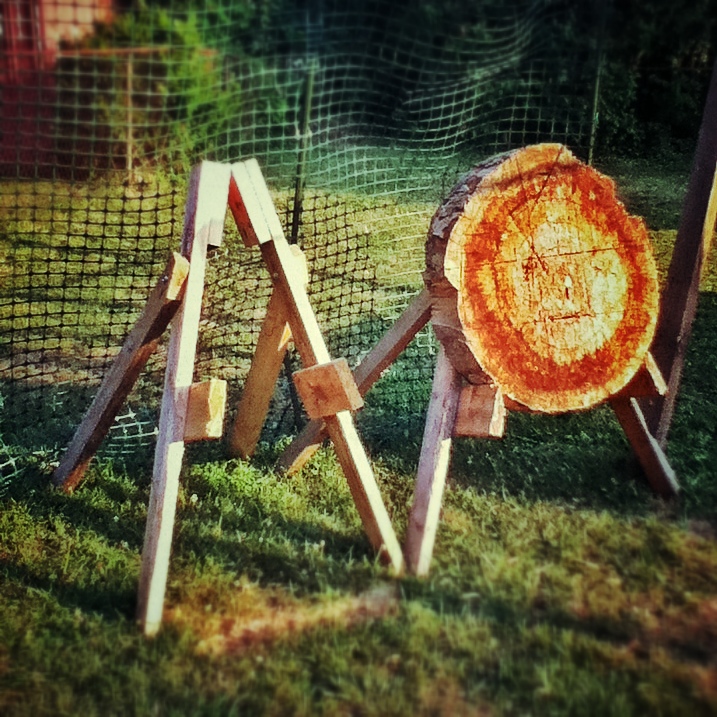
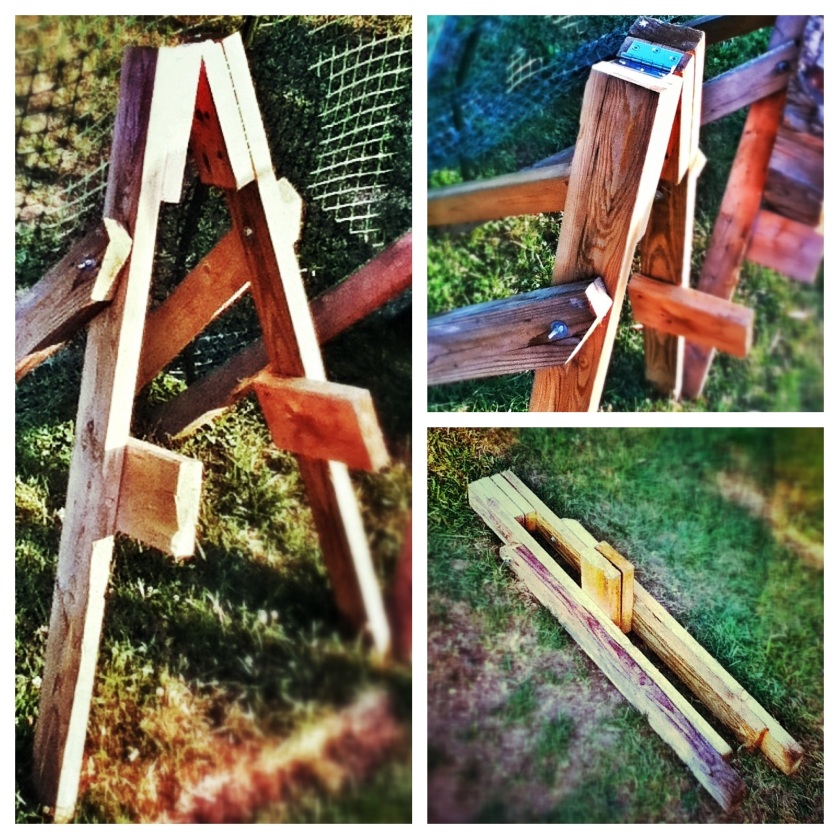
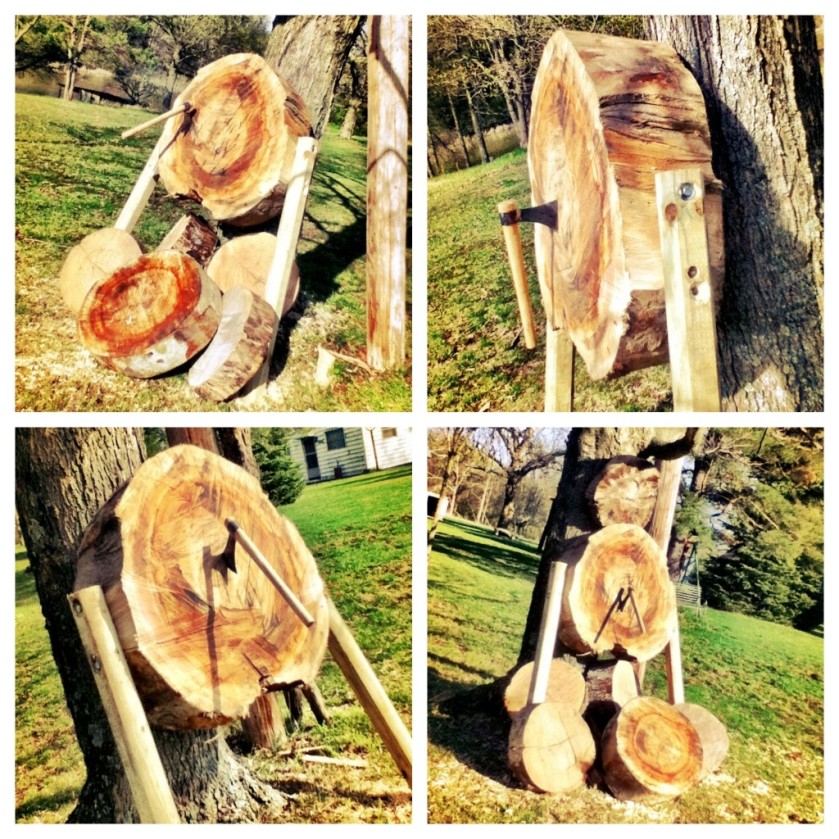
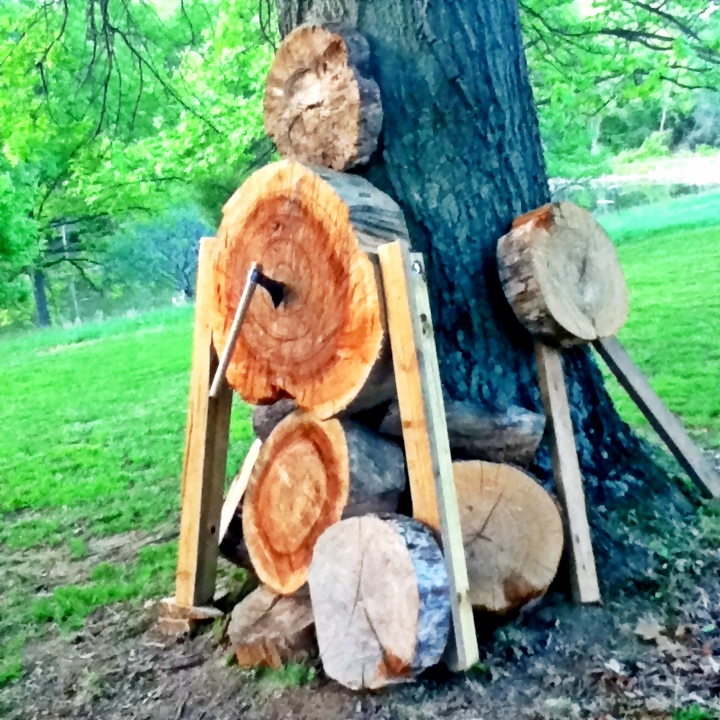
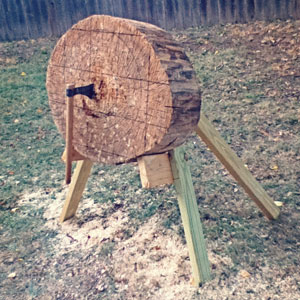
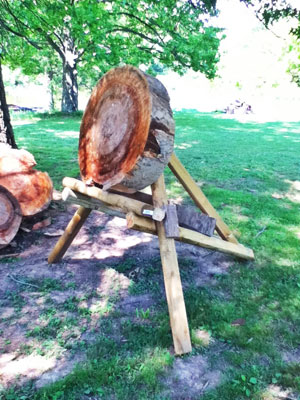
The portable stand is what the TomahawkGuys use most. It is easy to move around, is sturdy and can hold up a large target. Because it folds up it can be stored or transported easily. This can easily be built in about 30 minutes. The target block just sets on the support arms and can be easily rotated or flipped to the other side to maximize the target block life. It can be made entirely from 2×4’s but we recommend using 2×6’s for the target block support arms if you have a large and heavy target block. We start with two 8′- 2×4’s. Cut them both in half or 48″. Next cut off 6″ from 2 of the boards. You should have two 48″, two 42″, and two 6″ boards. Using at least 3 screws, attach the two 6″ pieces to the ends of the two 48″ pieces. These are the main front support legs. Connect these 2 legs together with a nice heavy hinge using at least 2″-3″ long screws. See the photos for reference.

About 12″ from the top is where the 42″ long back legs will attach with a 4″ x 5/16″ bolt with washers and a wing nut, do not use a galvanized bolt with a wing nut, you will not be able to turn the wing nut! I found this out the hard way. The top inside corner is cut at an angle so it doesn’t interfere with the target block.
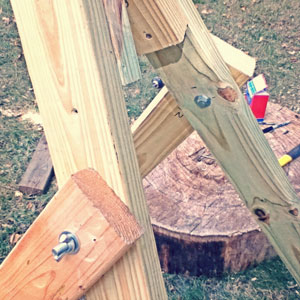
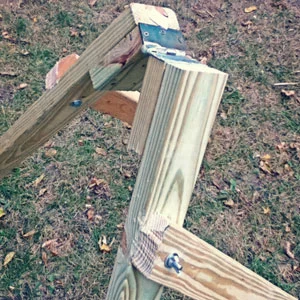
The 9″ long block support arms, as mentioned, can be either 2×4’s or 2×6’s and can be attached with screws anywhere on the front legs depending on how big the target block is that you are using. Use at least 4-5 screws spread apart vertically as much as possible to resist the downward force that a heavy target will apply. We usually attach the arms at a slight upward angle. We use screws instead of nails as it is easier to replace the arms or move them if need be.
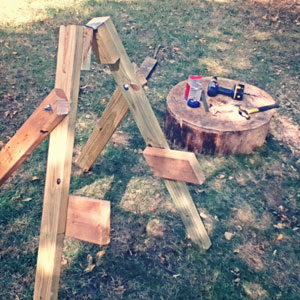
It is important that the top of the target block cover the top of the stand so that you do not hit the top of the stand, or hinge, with your hawk as that can chip your blade. That can also be adjusted somewhat depending on how far apart the front support legs are set. Use the photos as reference.
Heavy-Duty Stand

The heavy duty stand is made out of landscape timbers and can easily hold up our largest targets. It certainly is not very portable unless you have a pick-up truck, but it is easily moved around the yard as long as there is not a target block on there while moving it!. This stand took us about 2 hours to build. We were able to get it done with five 8′ landscape timbers. and a 3′ section of treated 2×4. To hold it all together we used two 6″ long x 1/2″ hex bolts and two 8″ long x 1/2″ hex bolts and about six nails. A chain saw was used to cut the various weird compound angles to create “flats” on the timbers to get it bolted together solidly. It also is a good idea to countersink the bolt hardware to minimize the chance of a tomahawk hitting the bolts. That would not be good for the ‘hawk blade!
Backstops

Unless you have a large yard with space behind the target blocks, you might have to use some kind of backstop to keep the hawk contained in the event that you miss the target. Pictured above is a backstop we made from heavy plastic “garden” fence that we picked up at “Lowe’s.” It is about 10 feet wide and 8 feet tall made by using wire ties to connect 2 sections. It was then attached to three 8 foot plastic garden poles. This is just big enough for two targets that are close together and would be perfect for just one target. We have found that the plastic poles do not hold up very well. I happen to have a couple old bamboo poles lying around that I am using now that my original green plastic garden poles have broken. I hope these last longer. It is harder to find a source for the bamboo poles, at least around here where the TomahawkGuys are.

You must be logged in to post a comment.